Patient ID — The Critical First Step
Before you touch a patient, you must confirm who they are. Misidentification is the #1 preventable error in phlebotomy and a leading cause of patient harm.
🏥 Why Patient ID Matters
Wrong blood in tube (WBIT) events — where a blood sample is collected but labeled for the wrong patient — are among the most dangerous errors in healthcare. The consequences include transfusing a patient with incompatible blood, resulting in potentially fatal hemolytic reactions.
The Joint Commission (TJC) mandates positive patient identification as National Patient Safety Goal #01 for all accredited facilities. Every phlebotomist is required to follow this protocol without exception, every single time.
✅ The Two-Identifier Rule
Always use at least two patient identifiers before collecting any specimen. Accepted identifiers include:
| Identifier | How to Verify | Acceptable? |
|---|---|---|
| Full legal name | Ask patient to state it (do NOT read it to them) | ✅ YES |
| Date of birth | Ask patient to state their DOB | ✅ YES |
| Medical Record Number (MRN) | Scan wristband or check chart | ✅ YES |
| Assigned patient ID number | As assigned by facility | ✅ YES |
| Room or bed number | — | ❌ NOT acceptable alone |
| SSN (full) | — | ❌ NOT acceptable (HIPAA risk) |
🏷️ Wristband Identification
In inpatient settings, all patients must wear an ID wristband. The phlebotomist must:
- Ask the patient to state their name and DOBDo NOT read the wristband first and confirm — ask openly.
- Compare to the wristbandCheck full name AND at least one other identifier (DOB or MRN).
- Compare to the requisition/orderAll three sources must match: patient verbal → wristband → lab order.
- Scan the barcode if availableElectronic bedside verification systems add another safety layer.
🧠 ID Flashcards
Tap each card to reveal the answer
🚨 Wrong Blood in Tube — Why It's the Highest-Stakes Error
Wrong Blood in Tube (WBIT) events occur when a blood sample collected from one patient is labeled with another patient's information. This is one of the most dangerous errors in laboratory medicine, because the specimen appears completely normal but produces results attributed to the wrong person.
The consequences cascade: A Type A patient's blood processed under a Type B patient's name leads to a blood bank issuing Type A blood for transfusion into the Type B patient — whose anti-A antibodies trigger an acute hemolytic reaction. This is fatal in 5–10% of cases.
How WBIT happens:
- Phlebotomist draws Patient A first, forgets to label immediately, then draws Patient B — labels both at the counter using memory (wrong)
- Pre-labeled tubes prepared before entering the room, then applied to wrong patient
- Room-number-based identification without wristband confirmation
- Accepting another patient's verbal confirmation without wristband cross-check
📝 Knowledge Check
Patient Communication & Anxiety Management
Your words and tone are tools. A calm, confident phlebotomist reduces patient anxiety, reduces vasovagal reactions, and builds the trust that makes the draw go smoothly.

💬 The AIDET Framework
Many healthcare systems use AIDET to standardize therapeutic communication. Every patient encounter should follow this structure:
- AcknowledgeMake eye contact, smile, knock and introduce yourself. "Good morning — knock knock!" (even if the door is open)
- Introduce"Hi, I'm Alex, I'm a phlebotomist from the lab." State your name AND role — patients deserve to know who is entering their space.
- Duration"This will only take about 3–5 minutes." Set realistic expectations to reduce anticipatory anxiety.
- Explanation"I'm here to collect a blood sample that Dr. Chen ordered. I'll be drawing from your arm." Explain what you'll do, not what's being tested (that's the physician's role).
- Thank You"Thank you for your patience. You did great!" Close the interaction positively — it affects the patient's perception of the entire visit.
😰 Managing Needle Anxiety & Vasovagal Response
Up to 20% of patients report significant needle phobia. Vasovagal syncope (fainting) is the most common adverse event during phlebotomy and is almost entirely preventable.
Prevention Strategies
- Always have the patient supine or reclined — never draw from a standing or unsupported patient
- Ask about previous fainting history: "Have you ever felt faint during a blood draw before?"
- Use distraction: casual conversation, deep breathing cues, or having the patient look away
- Applied tension technique: Have anxious patients tense leg/arm muscles to increase blood pressure
- Ensure patient is hydrated — dry veins collapse more easily and increase anxiety
📋 Special Communication Scenarios
| Scenario | Best Practice |
|---|---|
| Confused or altered patient | Speak slowly, use simple words; get nurse for assistance; document cognitive status |
| Hearing impaired | Face the patient, speak clearly; use written communication; check for interpreter |
| Non-English speaking | Use certified medical interpreter (in-person or phone); never use family to interpret |
| Pediatric patient | Explain to parent AND child; use age-appropriate language; never say "it won't hurt" |
| Patient refuses | Respect refusal; document "patient refused"; notify ordering provider immediately |
| Patient in pain | Acknowledge the pain; ask if they want a moment; alert nursing if pain is uncontrolled |
🚫 What NOT to Say
- ❌ "This is just a routine check, nothing to worry about" — you don't know that
- ❌ "It won't hurt at all" — it might, and broken promises destroy trust
- ❌ "You have really bad veins" — this increases anxiety; say "I'll find the best spot"
- ❌ "Your doctor thinks you might have..." — scope of practice violation
- ✅ "You might feel a brief pinch — I'll be as quick as possible"
- ✅ "I'll take good care of you"
- ✅ "Let me know if you need a break at any point"
💬 AIDET Deep Dive — Making Each Letter Count
AIDET (Acknowledge, Introduce, Duration, Explanation, Thank You) is the most widely used patient communication framework in American healthcare. Developed by Studer Group, it is required by TJC-accredited facilities and taught in virtually every HCAHPS-conscious health system. Understanding AIDET is not just about passing exams — it directly affects whether your patients cooperate with care, hold still during the draw, and report satisfaction.
A — Acknowledge: Make eye contact and greet the patient by name. Knock before entering. These actions signal: "I see you as a person, not a task." Patients who feel acknowledged are measurably less anxious and less likely to move during a draw.
I — Introduce: State your full name and your specific role: "I'm Maria, I'm a certified phlebotomist with the laboratory." Patients interacting with multiple healthcare professionals often lose track of who is who. Clear role identification prevents confusion about scope — no, you're not the one who will interpret results or give medication.
D — Duration: "This will take about 2–3 minutes." Giving patients a time estimate dramatically reduces anxiety. The unknown is always more frightening than the known. Patients who know how long a procedure takes are better able to tolerate it.
E — Explanation: "I'm going to collect two tubes of blood for your morning labs. I'll clean the inside of your elbow, apply a small tourniquet, and insert a needle. Most patients say it feels like a quick pinch." Using plain language (not "venipuncture," not "I'm going to draw some blood from your antecubital fossa") keeps patients informed without creating new anxiety from medical jargon.
T — Thank You: "Thank you for your patience — you did great." This closes the interaction on a positive note, reinforces the patient's cooperative behavior, and contributes directly to HCAHPS patient experience scores which affect hospital reimbursement.
📝 Knowledge Check
Positioning & Site Selection
The right position and the right site make every draw safer, faster, and less painful. Site selection is both science and art — you're reading anatomy in real time.
🪑 Patient Positioning
Outpatient (Seated in Phlebotomy Chair)
- Patient seated with arm extended downward at a slight downward angle (not horizontal) — gravity helps engorge the vein
- Arm must be supported on the armrest — never unsupported (prevents movement and drop injury)
- Patient should be fully in the chair — not perched on the edge (syncope risk)
- High-risk patients (previous fainting, elderly, pediatric): use reclining chair position
Inpatient (Bedside)
- Patient supine (lying flat) or with head slightly elevated if respiratory issues
- Lower the bed rail on your working side
- Arm supported on bed — use a rolled towel under elbow if needed for extension
- Adjust bed height to your working comfort — protect your back
🩺 Antecubital Fossa — Primary Draw Site
The antecubital fossa (ACF) is the hollow of the elbow — the preferred venipuncture site in most patients. It contains three main veins in a consistent anatomical arrangement:
🚫 Sites to Avoid
| Site / Condition | Reason to Avoid |
|---|---|
| Arm with IV infusion (same side) | Dilutes specimen — results inaccurate |
| Arm post-mastectomy (same side) | Risk of lymphedema — may worsen condition |
| Hematoma / bruised area | Causes pain, hemolysis, inaccurate results |
| Burns, rashes, open wounds | Infection risk, patient harm |
| Arm with arteriovenous (AV) fistula | Risk of infection, clotting of dialysis access |
| Edematous (swollen) arm | Excess tissue fluid dilutes specimen |
| Scarred/fibrosed veins | Difficult to cannulate, collapse risk |
| Foot / ankle veins | High clotting risk; only with physician order |
🪑 Vasovagal Syncope — Prevention and Management
Vasovagal syncope (fainting) is the most common complication of venipuncture, occurring in 1–2% of outpatient blood draws and more frequently in anxious, fasting, or pediatric patients. Understanding the physiology helps you prevent and manage it.
The physiology: The sight of blood, pain, or anxiety triggers a parasympathetic (vagus nerve) response: bradycardia (heart slows), vasodilation (blood vessels dilate), hypotension (blood pressure drops). Blood pools in the periphery and the brain receives insufficient perfusion — the patient loses consciousness.
Warning signs (prodrome — act immediately):
- Pallor — sudden skin color change to white or gray
- Diaphoresis — cold, clammy sweat on forehead
- Nausea — patient says "I feel sick"
- Dizziness or lightheadedness
- Yawning (often missed — sign of brain hypoperfusion)
- Slurred or slowing speech
If prodrome occurs during a draw:
- Remove the needle immediately
- Apply gauze with pressure
- Lower patient's head below their heart (Trendelenburg-like position) OR recline the chair
- Apply cool damp cloth to forehead/neck
- Do not leave the patient unattended
- Alert nursing staff if in inpatient setting; call for help if outpatient
If patient actually faints (loss of consciousness): Protect from falling, call for help, assess airway, do not attempt to reinsert the needle. Document the event completely.
📝 Knowledge Check
Vein Assessment Techniques
Palpation is your most important diagnostic tool. Learning to "read" a vein with your fingertips is what separates a good phlebotomist from a great one.

🖐️ The Art of Palpation
Always palpate (feel) a vein before you commit to inserting a needle. Visual inspection alone is not sufficient — a visible vein may be a tendon, and a great vein may be invisible under the skin.
What You're Feeling For
- Bouncy/resilient feel — a healthy vein rebounds when gently depressed
- Depth — superficial vs. deep; you may need to adjust needle angle
- Direction and path — trace the vein with your fingertip 1–2 inches
- Anchored vs. rolling — anchor the skin distally to stabilize rolling veins
- Pulsation — a pulsating vessel is an artery — do NOT proceed
🔍 Vein Enhancement Techniques
When veins are difficult to locate, these techniques help engorge and visualize them:
- Warm the siteWarm compresses or warm towel for 3–5 minutes causes vasodilation, increasing vein diameter up to 35%.
- Gravity-assisted positioningLower the arm below heart level — gravity increases venous filling. Have patient clench and release fist slowly (avoid repeated pumping).
- Tourniquet applicationApply 3–4 inches above site; increases back-pressure, engorging distal veins. (See Lesson 5 for full technique.)
- TransilluminationVeinViewer or infrared light devices project real-time vein maps on the skin — used in pediatric and difficult-draw patients.
- Gentle tappingLight tapping on the vein releases histamine, causing local vasodilation. Use 2 fingers, not hard slaps.
🩸 Vein Quality Assessment Table
| Vein Characteristic | Description | Best Approach |
|---|---|---|
| Ideal vein | Visible, bouncy, 3–4mm diameter, straight path | Standard 21G needle, 15–30° angle |
| Superficial vein | Just under skin surface, may look prominent | Shallower angle (10–15°), gentle touch |
| Deep vein | Felt but not seen; firm pressure needed to palpate | Steeper angle (30°), confirm with palpation throughout |
| Rolling vein | Slides laterally when touched | Anchor skin distally with thumb, insert firmly |
| Fragile/elderly vein | Thin, translucent, bruises easily | 23G butterfly, minimal tourniquet pressure |
| Sclerosed vein | Hard, cord-like, won't bounce | Avoid — select a different site |
| Thrombosed vein | Hard, non-compressible, painful | Avoid — risk of embolism |
🧠 Palpation Flashcards
Tap to flip
🖐️ Difficult Draws — Advanced Vein Enhancement
Some patients present with veins that are not immediately accessible through standard tourniquet and palpation techniques. These strategies improve success rate:
Warming: Heat causes vasodilation, bringing veins closer to the surface and increasing their diameter. Warm (not hot) compress or warm pack for 5–10 minutes. Commercial chemical warmers are available for field use. Particularly helpful in elderly patients, cold environments, and patients in shock.
Hydration: Dehydrated patients have reduced intravascular volume, making veins visibly smaller and more likely to collapse on needle insertion. If a patient reports being dehydrated, recommend they drink water before rescheduling if the draw is routine. For inpatients, consult the care team — the patient may have IV fluid running.
Positioning: Gravity works. For arm veins, allow the arm to hang down for 1–2 minutes with the tourniquet applied — blood pools distally. For hand veins, the hanging technique is particularly effective.
Multiple tourniquet technique: For deeply buried veins, apply tourniquet at the upper arm AND at the forearm simultaneously. This creates more pronounced distal distension in the antecubital fossa.
Transillumination devices: Infrared vein finders (AccuVein, VeinViewer, etc.) project near-infrared light that highlights subcutaneous veins on the skin surface. Most effective in obese patients and pediatric patients. Used at many pediatric hospitals as standard practice.
📝 Knowledge Check
Tourniquet Application — Technique & Timing
The tourniquet is a tool, not a crutch. Applied correctly, it makes veins accessible. Applied incorrectly, it contaminates your specimen and harms your patient.
🩹 Tourniquet Basics
Purpose
A tourniquet temporarily compresses superficial veins, reducing venous outflow while arterial blood continues flowing in — this engorgement makes veins more prominent and easier to puncture.
Types
- Latex tubing — traditional, inexpensive; must check for latex allergy
- Latex-free velcro/flat band — recommended for sensitive skin and latex-allergic patients
- Blood pressure cuff — used for patients with very fragile veins; inflate to 40–60 mmHg
📐 Proper Application Technique
- Position: 3–4 inches above the intended siteThis allows enough room to palpate and work below the tourniquet without contamination.
- Apply with enough tension to occlude venous flowThe tourniquet should be snug — you should be able to slide one finger under it. Too tight = arterial occlusion; too loose = no venous engorgement.
- Create a "tail" for easy releaseThe half-bow knot allows single-handed release. Practice this until it's automatic — you'll need to release it one-handed while holding the needle in place.
- Start timing immediatelyThe clock starts the moment the tourniquet is applied — you have a maximum of 1 minute.
- Palpate, select site, prep skinNow perform your vein assessment and antiseptic prep during the 60-second window.
- Release BEFORE drawing or immediately after flashRelease before inserting the needle, OR as soon as you see blood flash into the hub. Do not leave applied during collection.
⏱️ The 1-Minute Rule — Why It Matters
| Analyte | Effect of Prolonged Tourniquet |
|---|---|
| Potassium (K⁺) | Falsely ELEVATED — most affected |
| Protein (total) | Falsely elevated |
| Cholesterol, lipids | Falsely elevated |
| Calcium | Falsely elevated |
| CBC — RBC/Hgb/Hct | Falsely elevated (hemoconcentration) |
| Coagulation tests | Can be affected by venous stasis |
⏱️ Hemoconcentration — The Hidden Result Corruptor
Hemoconcentration is a systematic alteration of blood composition caused by prolonged tourniquet application. When venous outflow is restricted for more than 1 minute, fluid (water) migrates from the intravascular space into surrounding tissue, leaving behind a higher concentration of larger molecules that cannot cross the vessel wall.
What becomes falsely elevated by hemoconcentration:
- Potassium (K⁺): Can rise 1–2 mEq/L — potentially moving a patient from normal (4.0) to "critical high" (6.0+) based solely on tourniquet time
- Total protein and albumin: Protein-bound drugs may appear elevated
- Calcium, cholesterol, triglycerides: All elevate with hemoconcentration
- Hematocrit and RBC count: Appear elevated as fluid leaves vessels
- Enzyme levels (ALT, AST): Falsely elevated
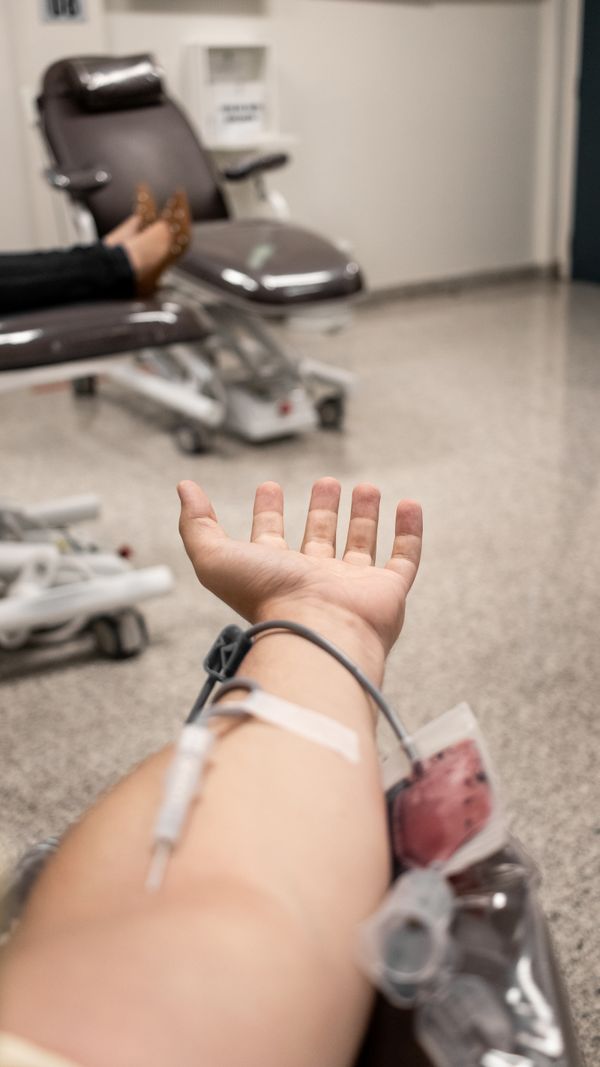
Prevention: Release the tourniquet before the last tube fills, or as soon as blood flow is established in the first tube. If hemoconcentration is suspected due to a prolonged tourniquet time, document it on the requisition and consider recollection for critical values.
Fist pumping: Asking a patient to pump their fist repeatedly (not just make a fist once) also elevates potassium through muscle K⁺ release. Ask the patient to make a fist once and hold it — do not ask them to repeatedly pump.
📝 Knowledge Check
Special Patient Populations
No two patients are the same. Pediatric, geriatric, obese, and oncology patients each require specific adaptations to your technique, communication, and equipment choices.
👶 Pediatric Patients
Communication
- Always explain to both parent AND child — use age-appropriate language
- Toddlers/preschoolers: play-based prep, tell them they'll feel a "tiny ouchie"
- School age: explain what you're doing; they want to understand
- Teens: treat like adults — respect their autonomy; don't talk over them
Technical Adaptations
- Use 23G butterfly needle for children under 12; 25G for infants
- Minimum blood volume collection — use micro-collection tubes where possible
- Heel stick (dermal puncture) preferred for infants under 12 months and neonates
- May require a second phlebotomist or nurse to assist with positioning
- Apply topical anesthetic (EMLA cream) when time allows — typically 45–60 min before
- Distraction: light-up toys, blowing bubbles, counting
👴 Geriatric Patients
- Veins may be fragile, tortuous (winding), and prone to rolling — anchor carefully
- Skin is thinner and tears easily — avoid tape on fragile skin; use self-adherent wrap
- Reduced subcutaneous fat means veins are more superficial — use shallower angle
- Use 23G butterfly or small gauge for fragile veins
- Reduced tourniquet tension — tight tourniquet can bruise or damage fragile veins
- Cognitive decline — speak slowly, repeat instructions, confirm understanding
- May be on anticoagulants (warfarin, heparin, Xarelto) — apply pressure longer (5+ minutes)
- Hearing loss common — face the patient when speaking, don't shout
⚖️ Obese Patients
- Veins are deeper — require deeper palpation and steeper needle angle (30–45°)
- Landmark by palpation, not visual — the vein may not be visible at all
- Use longer needles (1.5 inch) if veins are very deep
- Dorsal hand veins may be more accessible than antecubital in very obese patients
- Ensure patient is fully supported — standard phlebotomy chairs may not be adequate
- Avoid the inner wrist — higher risk of nerve/tendon injury due to altered anatomy
🩺 Oncology / Chemotherapy Patients
- Veins may be sclerosed from repeated IV chemotherapy
- May have a central venous catheter (CVC), PICC line, or port — collection from these requires special training (generally NOT phlebotomist's scope without specific training)
- Immunocompromised — meticulous antiseptic technique; double cleansing recommended
- Thrombocytopenic (low platelets) — apply pressure for extended time; watch carefully
- Neutropenic precautions may be in effect — check room signage before entering
👶 Neonatal & Pediatric Draws — Critical Differences
Drawing blood from neonates (birth to 28 days), infants, and young children requires specialized technique, equipment, and emotional intelligence. Pediatric phlebotomy is one of the most challenging skills to develop.
Volume considerations: A premature neonate may have only 80–100 mL of total blood volume. Drawing 10 mL per kg in a week from a critically ill neonate causes iatrogenic anemia requiring transfusion. NICU phlebotomists track cumulative draw volumes carefully. Microtainer tubes (200–500 µL) are used instead of full-size vacuum tubes.
Heelstick technique:
- Use the medial or lateral plantar heel surface — NEVER the posterior heel (Achilles area) or fingertips in neonates
- Warm the heel for 3–5 minutes before puncture to increase capillary blood flow
- Use approved lancet depth for neonate heel (1.0 mm maximum depth for premature, 2.0 mm for term)
- First drop: wipe away — may contain tissue fluid. Collect from freely flowing blood
- Do not squeeze excessively — causes hemolysis and tissue fluid dilution
Child-life specialists: Pediatric hospitals use child-life specialists — trained professionals who use distraction, play, and developmentally appropriate preparation to reduce procedural anxiety. Work WITH child-life specialists, not around them. They know the patient and can tell you the best approach for each child.
Parent presence: Most pediatric facilities allow and encourage parent presence during draws. Brief parents on what to expect. A calm parent helps a calm child. An anxious parent makes a frightened child harder to draw from.
📝 Knowledge Check
Pre-Collection Preparation Checklist
Great phlebotomists are never reactive — they're systematic. A complete pre-draw checklist prevents errors before they happen. This is your pre-flight check.
📋 The Master Pre-Collection Checklist
- Verify the lab order/requisitionConfirm: patient name, MRN, test ordered, test priority (STAT vs. routine), ordering provider, collection date/time. Flag any unusual tests for supervisor review.
- Check patient diet/fasting requirementsLipid panels and glucose tests typically require 10–12 hours fasting. Ask: "Have you had anything to eat or drink besides water in the last 12 hours?" Document fasting status on the requisition.
- Check timing requirementsSome tests are time-sensitive: cortisol (morning draw), therapeutic drug monitoring (peak/trough levels), blood cultures (before antibiotic administration if possible).
- Gather supplies before enteringNever interrupt a draw to get forgotten supplies. Prepare: correct tube types in order of draw, needle/butterfly, adapter, tourniquet, alcohol swabs, gauze, tape, labels, sharps container access.
- Verify tube types for ordered testsCross-reference the requisition with the test-to-tube reference guide. Wrong tube = invalid or cancelled specimen.
- Hand hygieneWash hands or use ABHR (alcohol-based hand rub) before entering the patient's space — not just before touching the patient. This is WHO Moment #1.
- Knock, introduce, and confirm positive IDFollow the two-identifier protocol every time, even if you've drawn this patient before.
- Put on glovesGloves go ON immediately before patient contact. Never enter a patient room with gloves already on.
🧪 Fasting & Timed Specimens
| Test | Fasting Required? | Special Timing? |
|---|---|---|
| Lipid panel / cholesterol | Yes — 10–12 hours | Morning preferred |
| Fasting blood glucose | Yes — 8–12 hours | Morning preferred |
| HbA1c | No | Anytime |
| Basic / Complete Metabolic Panel | Preferred fasting | Morning preferred |
| Cortisol (AM) | No | 7–10 AM (diurnal peak) |
| Drug levels (trough) | No | Immediately BEFORE next dose |
| Drug levels (peak) | No | 30–60 min AFTER dose per protocol |
| Blood cultures | No | Before antibiotic administration if possible |
| CBC, BMP, CMP | Preferred fasting | Any time in emergencies |
| PT/INR, PTT | No | Anytime; consistent timing for serial tests |
📦 Equipment Preparation
Standard Draw Tray Setup
- Tubes (in order of draw, labels ready but not yet applied)
- 21G multi-sample needle with safety feature, or 23G butterfly set
- Vacutainer adapter / holder
- Latex-free tourniquet
- 70% isopropyl alcohol swabs (× 2)
- Gauze pads (2×2 or 4×4)
- Bandage or tape
- Sharps container (always within reach — never recap; never cross the room to dispose)
- Patient labels (pre-printed with 2 identifiers)
📝 Knowledge Check
Clinical Scenarios: Putting It All Together
You've learned the rules. Now apply them. These real-world scenarios test your judgment under pressure — the kind of decisions you'll face in Week 3 clinicals.
🏥 Clinical Decision Scenarios
Scenario 1: The Confused Patient
You arrive at Room 412 to collect a CBC and BMP on "Maria Gonzalez, DOB 03/15/1948." You greet the patient and ask for her name. She looks at you blankly and says "I don't know." Her wristband is missing. A family member in the room says "That's Maria, don't worry about it."
Scenario 2: The Bilateral IV Patient
Your patient is a 68-year-old post-op patient with IVs running in both arms — right antecubital (D5W at 100 mL/hr) and left forearm (antibiotic infusion). You have a STAT electrolyte panel ordered. What do you do?
Scenario 3: The Vasovagal Episode
You're mid-draw on a 22-year-old first-time blood donor. You've just started filling the second tube when she says "I feel really dizzy and I can see spots." Her face is pale and she starts to slump.
Scenario 4: The Difficult Pediatric Draw
You need to collect a CBC on a 4-year-old who is screaming and pulling away. The mother says "Can you just grab his arm quickly? He'll be fine once it's done." You've been unable to find a good vein in 2 attempts.
Module 3 Mastery Quiz
Test your understanding with 20 questions on the topics covered in this module.