Pre-Analytical Variables — Where Most Errors Hide
70% of all lab errors occur in the pre-analytical phase — before the specimen ever reaches an analyzer. Processing starts the moment you draw the blood.
🔬 The Three Phases of Lab Testing
| Phase | What Happens | Error Rate |
|---|---|---|
| Pre-analytical | Patient prep, collection, labeling, transport, centrifuge, aliquot | ~70% of all errors |
| Analytical | Instrument analysis, QC checks, reagent performance | ~13% |
| Post-analytical | Result reporting, critical value notification, distribution | ~17% |
⚠️ Key Pre-Analytical Variables
| Variable | Effect on Results | Prevention |
|---|---|---|
| Hemolysis | ↑K⁺, LDH, AST, Hgb | Correct technique, dry alcohol, avoid small gauge for large draws |
| Lipemia (non-fasting) | Interferes with optical tests; ↑triglycerides | Confirm fasting; note non-fasting on requisition |
| Icterus (high bilirubin) | Spectrophotometric interference | Inherent to patient condition — note on requisition |
| Wrong tube/additive | Coagulation errors, falsely elevated/decreased analytes | Follow order of draw; verify tube for test |
| Prolonged tourniquet | Hemoconcentration: ↑K⁺, proteins, lipids | Release within 1 minute |
| Delayed centrifuge | ↑K⁺, ↓glucose (no fluoride), enzyme changes | Centrifuge within 30 min–2 hrs per tube type |
| Wrong temperature transport | Cell death, enzyme degradation, gas exchange | Ice for ABG/ammonia; body temp for cultures |
| Vigorous mixing | Hemolysis | Gentle inversion only |
🔬 Pre-Analytical Phase — Where 70% of Errors Begin
The pre-analytical phase encompasses everything that happens to a specimen before it reaches the analyzer — patient preparation, specimen collection, transportation, reception, and pre-processing. This phase is almost entirely under the control of phlebotomists and nurses, which is why understanding it is critical.
Pre-analytical error categories and real consequences:
| Error Type | Frequency | Example Consequence |
|---|---|---|
| Patient ID error / Wrong patient | Common | Wrong blood transfusion → fatal hemolytic reaction |
| Mislabeling (right patient, wrong label) | Most common serious error | Therapeutic decisions made on wrong patient's data |
| Hemolysis | Very common | False K⁺ elevation → unnecessary cardiac workup or treatment |
| Wrong tube / additive | Common | EDTA in chemistry tube → false low Ca²⁺, Mg²⁺, Zn²⁺ |
| Underfill (citrate tube) | Common | PT/INR elevated → patient withheld from surgery unnecessarily |
| Drawing above IV | Common | Glucose 1,000 mg/dL → unnecessary insulin treatment |
| Improper transport temperature | Moderate | ABG result invalid due to O₂ consumption in non-iced tube |
| Delayed centrifugation | Moderate | K⁺ falsely elevated from RBC leak; glucose falsely low (metabolism continues) |
📝 Knowledge Check
Centrifuge, Serum & Plasma
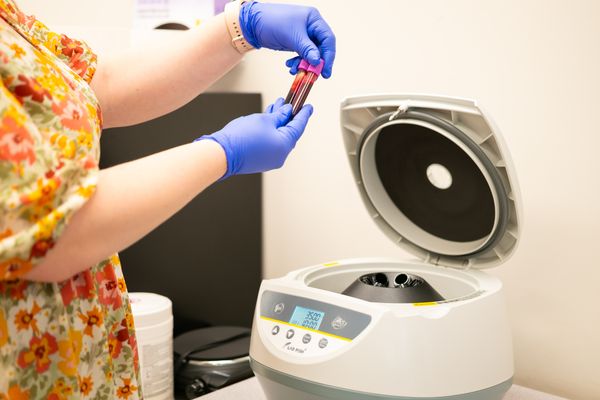
The centrifuge separates blood components by density. Understanding what you're creating — and the critical timing rules — prevents errors that ruin specimens.
🔄 What the Centrifuge Does
Spinning blood at high speed separates it by density into distinct layers. After centrifugation, a serum separator tube (SST) looks like this:
Top layer — liquid portion after clotting; no cells or fibrinogen
Separates serum from cells (SST only)
Bottom — RBCs, WBCs, platelets
⏱️ Centrifuge Timing Rules
- Allow SST/red tubes to clot completely before centrifuging30 minutes at room temperature (minimum). Incomplete clotting = fibrin strands in the serum = clot formation after centrifugation = invalid re-spun specimen.
- Do NOT centrifuge light blue tubes until clotting is not a concernCoagulation tubes should not be centrifuged prematurely — centrifuge within 1 hour of collection, after inverting properly.
- Centrifuge within 2 hours of collection for most tubesPotassium continues to shift out of cells over time. Delaying centrifuge falsely elevates K⁺, glucose falls, and enzymes degrade.
- Balance the centrifugeAlways balance opposite sides with equal weight. An unbalanced centrifuge can damage the instrument and produce uneven separation. Use a water-filled tube of equal volume as a counterbalance.
- Set correct speed (RCF) and timeTypical: 1,500–2,500 RPM for 10–15 minutes. Follow facility-specific settings — different tubes and gel barriers require specific protocols.
🧠 Centrifuge Flashcards
Tap to flip
🔄 Centrifuge Safety & Balanced Loading
The centrifuge is one of the most commonly used pieces of equipment in clinical labs and specimen processing areas. It generates tremendous force — up to 3,000 RPM — and improper use creates serious safety risks.
Balancing: Tubes must be balanced by weight (not just count) in the centrifuge rotor. An unbalanced rotor vibrates violently, can damage the centrifuge, and in extreme cases can cause the rotor to break free — a centrifuge rotor at 3,000 RPM is a projectile. Always place tubes diametrically opposite each other. If you have an odd number of tubes, add a water-filled tube of the same size and weight as a balance tube.
Gel separator tube (SST) requirements:
- Invert 5 times after collection to mix clot activator with blood
- Allow tube to clot completely at room temperature — 30 minutes minimum (some facilities 30–45 min)
- Centrifuge at 1,200–1,500 ×g for 10–15 minutes (check specific rotor and tube manufacturer specs)
- The silica gel separates to form a barrier between serum (top) and clot (bottom)
- If the gel barrier is incomplete or disrupted: the serum may be contaminated with cellular contents. Inspect before aliquoting.
Citrate tube (light blue) special rules:
- Do NOT centrifuge citrate tubes in a swinging-bucket centrifuge without verifying they are rated for it — some protocols require fixed-angle rotors
- Centrifuge immediately — do not allow to sit at room temperature before centrifuge (PT/PTT are time-sensitive)
- Centrifuge twice if producing platelet-poor plasma (for lupus anticoagulant testing)
📝 Knowledge Check
Aliquoting & Specimen Storage
Aliquoting — dividing a specimen into smaller portions — enables multiple tests from one collection. Proper storage determines whether results remain valid for hours, days, or months.
🧪 What is Aliquoting?
After centrifugation, serum or plasma is pipetted into secondary (aliquot) tubes. These labeled sub-specimens are then sent to different lab sections or stored for repeat testing or add-on orders.
Why It Matters
- Prevents multiple venipunctures for the same patient
- Allows simultaneous testing across multiple lab departments
- Provides backup specimen if primary is lost or damaged
- Required for some assays that need separated serum/plasma only
🌡️ Specimen Storage Temperature Guide
| Temperature | Range | Used For |
|---|---|---|
| Room temperature | 20–25°C | Most chemistry, CBC, coagulation short-term |
| Refrigerated | 2–8°C | Urinalysis, some hormones, chemistry (>2 hr before analysis) |
| Frozen (-20°C) | -20°C | Long-term storage, some drug levels, special chemistry |
| Deep frozen (-70°C) | -70 to -80°C | Molecular/DNA testing, virology, long-term archival |
| Body temp (37°C) | 35–37°C | Blood cultures (incubator), cold agglutinins |
| Ice (4°C) | 0–4°C | ABG, ammonia, lactic acid, ACTH |
🧪 Specimen Stability — Time and Temperature Matter
Analyte stability determines how long a specimen can be held before the result is still valid. Exceeding stability limits produces results that are biologically inaccurate — even if the specimen looks normal.
| Specimen Type | Temp | Stability | Reason for Limitation |
|---|---|---|---|
| Whole blood for CBC | 2–8°C or RT | 24 hrs (RT), 48 hrs (refrigerated) | WBC morphology deteriorates; platelets clump |
| Serum chemistry | 2–8°C | 5–7 days | Enzyme activity degrades; proteins denature |
| Coagulation plasma | Room temp (NOT refrigerated) | 4 hrs (uncapped); 14 days frozen (-20°C) | Cold activates factor VII → false elevation |
| Glucose (gray tube) | RT or 2–8°C | 24–48 hrs | Fluoride inhibits glycolysis but not indefinitely |
| ABG (arterial) | Ice water | 30 minutes to 1 hour | RBCs continue consuming O₂ and producing CO₂ |
| Ammonia | Ice water immediately | 20–30 minutes | RBCs and plasma produce ammonia at room temp |
| Urinalysis (no preservative) | 2–8°C | 2 hours | Bacteria multiply; casts dissolve; pH changes |
| Blood cultures | 37°C (incubator) immediately | Begin incubation within 2 hours | Antibiotic-sensitive bacteria die at room temp |
📝 Knowledge Check
Specimen Rejection & Quality Control
The lab's rejection criteria are your quality standard. Knowing them before you collect prevents a repeat painful venipuncture for the patient — and hours of delay in diagnosis.
🚫 Common Specimen Rejection Criteria
| Rejection Reason | Why Invalid | Prevention |
|---|---|---|
| Hemolysis (pink/red serum) | Cell contents contaminate serum: ↑K⁺, LDH, AST | Dry alcohol, correct gauge, avoid vigorous mixing |
| Mislabeled specimen | Patient safety — WBIT risk | Label at bedside, in front of patient, immediately after draw |
| No label | Cannot be attributed to a patient | Never collect without labeling immediately |
| Wrong tube type | Additive mismatch for test ordered | Verify tube vs. test before drawing |
| Underfilled light blue tube | Incorrect 9:1 citrate ratio → false coag results | Allow vacuum to fill to line |
| Clotted EDTA tube | Microclots prevent accurate CBC | Mix immediately 8–10 inversions; don't let sit |
| Specimen past stability | Analyte has degraded | Centrifuge and transport within required times |
| Lipemia (for optical tests) | Turbidity interferes with spectrophotometry | Confirm fasting; note on requisition |
| Unlabeled aliquot | Cannot be traced to patient | Label all aliquots before moving from primary tube |
🔬 Quality Control (QC) in Phlebotomy
QC extends beyond the analyzer to the entire pre-analytical process. Phlebotomists participate in QC by:
- Documenting all collections — time, site, tube lot numbers for blood cultures
- Maintaining equipment logs — centrifuge calibration dates, refrigerator temperature logs
- Reporting near-misses and errors — incident reports are QI tools, not punishments
- Following CLSI standards — approved guidelines are the QC framework for phlebotomy
- Participating in competency assessments — annual skill checks per CLIA requirements
🚫 Rejection Prevention — The Phlebotomist's Quality Checklist
Every rejected specimen represents a patient who must be re-drawn (more discomfort), delayed treatment (lost time), and waste (reagents, resources). Most rejections are preventable.
The top 10 rejection reasons and their prevention:
- Hemolysis — dry the alcohol before inserting; use appropriate gauge; gentle inversion; avoid excessive vacuum with fragile veins
- Insufficient volume (QNS) — fill tubes to their fill lines; verify tube volume before ordering small-gauge draws
- Wrong tube/additive — verify tube selection before drawing; follow order of draw chart
- Clotted EDTA or heparin tube — mix immediately after collection; check for clots by tilting tube before sending
- Unlabeled or mislabeled — label at bedside, never at nurses' station; two-identifier verification on label
- Label mismatch — name on label doesn't match requisition — label with exactly what is on the order; don't use nicknames
- Expired tubes — check expiration dates on tube lot when opening a new box; expired tubes have degraded additives
- Lipemia — document fasting status; notify care team if non-fasting interferes with critical tests
- Wrong patient name on label — verify before EVERY draw; new patient, new verification
- Specimen in wrong transport condition — ammonia and ABGs must go on ice; do not leave on desk "for a minute"
📝 Knowledge Check
Critical Values & Result Reporting
A critical value is a lab result so far outside normal that it represents an immediate life threat. The lab must notify the provider within minutes. Know these values — they save lives.
🚨 Common Critical Values
| Test | Critical Low | Critical High | Risk If Missed |
|---|---|---|---|
| Potassium (K⁺) | <2.5 mEq/L | >6.5 mEq/L | Cardiac arrhythmia, arrest |
| Sodium (Na⁺) | <120 mEq/L | >160 mEq/L | Seizures, coma, death |
| Glucose | <40 mg/dL | >500 mg/dL | Hypoglycemic coma; DKA |
| Hemoglobin | <6.0 g/dL | >20 g/dL | Cardiopulmonary failure; polycythemia |
| Platelet count | <50,000/µL | >1,000,000/µL | Bleeding; thrombosis risk |
| PT/INR | — | >30 sec / INR >5.0 | Severe bleeding, hemorrhage |
| Calcium | <6.0 mg/dL | >13.0 mg/dL | Tetany, seizures; hypercalcemic crisis |
| pH (arterial) | <7.20 | >7.60 | Severe acidosis/alkalosis; cardiac effects |
📞 Critical Value Reporting Protocol
Critical values must be reported immediately upon result — every facility has a defined timeframe (typically within 30–60 minutes of result availability).
- Lab tech identifies a critical valueThe LIS (Lab Information System) flags it and an alert fires. The tech must verify the result is not a pre-analytical error (e.g., hemolysis causing false ↑K⁺).
- Call the ordering provider or nurse directlyRead-back protocol: state the patient name, MRN, test, result, and unit. The recipient must repeat back the value for confirmation.
- Document the notificationTime called, person notified (name and role), value reported, and read-back confirmation. This documentation is a regulatory requirement.
- If provider is unreachableFollow facility escalation protocol — charge nurse, house officer, department head. A critical value notification must reach a responsible clinician within the required window.
🚨 Critical Value Communication — Your Role in Patient Safety
Critical values are laboratory results that represent life-threatening states requiring immediate clinical intervention. When a critical value is detected by the laboratory, a defined notification chain is activated — and phlebotomists must understand this chain to protect patients.
Common critical values (examples — facility-specific ranges apply):
| Test | Critical Low | Critical High | Urgency |
|---|---|---|---|
| Glucose | <40 mg/dL | >500 mg/dL | Hypoglycemia → brain damage/death; DKA |
| Potassium (K⁺) | <2.5 mEq/L | >6.5 mEq/L | Cardiac arrhythmia, cardiac arrest |
| Sodium (Na⁺) | <120 mEq/L | >160 mEq/L | Cerebral edema; neurologic damage |
| Hemoglobin | <7 g/dL | >20 g/dL | Symptomatic anemia → transfusion; polycythemia → clotting |
| Platelet count | <20,000/µL | >1,000,000/µL | Spontaneous bleeding; thrombosis |
| PT/INR | — | >3.5 (non-therapeutic) | Excessive anticoagulation → bleeding |
| Troponin I | — | Any elevation (>0.04 ng/mL) | Myocardial injury → possible MI |
| Lactate | — | >4 mmol/L | Severe sepsis/shock — tissue hypoperfusion |
The phlebotomist's role in critical values: You don't report critical values — the lab analyst does, directly to the ordering provider. But if you collected a STAT draw and you know a critical result is being reported, ensure your documentation is accurate (collection time, collector ID) so the timeline of care is clear.
📝 Knowledge Check
CLIA-Waived Point-of-Care Testing
POC testing brings the lab to the patient — results in minutes, not hours. CLIA-waived tests are simple, low-complexity tests that phlebotomists commonly perform in outpatient and community settings.
🏥 What Is CLIA?
The Clinical Laboratory Improvement Amendments (CLIA) of 1988 regulate all laboratory testing in the United States. CLIA classifies tests by complexity:
- Waived — simple, low risk of error; FDA-approved for home use or CLIA-waived settings; minimal training required
- Moderate complexity — requires trained personnel, QC, proficiency testing
- High complexity — most laboratory testing; requires laboratory scientists
🩺 Common CLIA-Waived Tests
| Test | Device/Method | Specimen | Clinical Use |
|---|---|---|---|
| Blood glucose | Glucometer (e.g., OneTouch) | Fingerstick capillary | Diabetes monitoring, hypoglycemia screening |
| Hemoglobin/hematocrit | i-STAT, HemoCue | Fingerstick or venous | Anemia screening, pre-donation screening |
| Urine dipstick | Chemstrip/Multistix | Urine | UTI, kidney disease, diabetes screening |
| Rapid strep A | Lateral flow immunoassay | Throat swab | Streptococcal pharyngitis |
| Rapid influenza | Lateral flow immunoassay | Nasopharyngeal swab | Flu A/B diagnosis |
| Pregnancy test (urine hCG) | Lateral flow immunoassay | Urine | Pregnancy confirmation |
| Fecal occult blood (FOBT) | Guaiac method | Stool | Colorectal cancer screening |
| INR (CoaguChek) | Whole blood analyzer | Fingerstick | Anticoagulation monitoring (warfarin) |
🔧 QC Requirements for CLIA-Waived Tests
Even waived tests require quality control:
- Run control solutions (high, low, normal) at the frequency specified by the manufacturer
- Document all QC results in a QC log
- Check expiration dates on test strips/reagents before use
- Store reagents per manufacturer instructions (some require refrigeration)
- Verify the device was calibrated on schedule
- Never report patient results if QC is out of range — repeat QC, troubleshoot, call supervisor
🏥 POCT Devices — What Phlebotomists Operate
Point-of-care testing (POCT) brings lab testing to the patient's bedside. Many phlebotomists are trained and certified to operate POCT devices — extending their role beyond collection into basic testing.
Common POCT devices phlebotomists may operate:
| Device | Tests | Specimen | Key QC Consideration |
|---|---|---|---|
| Glucometer | Glucose | Capillary blood | Run low and high controls daily and with each new strip lot |
| iStat (Abbott) | BMP, BNP, troponin, lactate, ABG, coag | Whole blood (capillary or venous) | Electronic QC with each cartridge; check printer for transmission errors |
| HemoCue | Hemoglobin | Capillary blood | Run cuvette control and optical control daily |
| Rapid influenza/RSV/Strep tests | Antigen detection | Nasal swab/throat swab | Waived complexity — run positive and negative controls per kit instructions |
| INRatio / CoaguChek | PT/INR | Capillary blood | External control per manufacturer schedule; results may differ slightly from central lab |
The CLIA waiver does NOT mean "no quality control": Waived tests are named "waived" because they are exempt from CLIA inspection, not because they are exempt from quality control. Every waived test must still have controls run, documented, and acted upon when out of range. Failing to document QC is one of the most common regulatory compliance issues found during Joint Commission surveys.
📝 Knowledge Check
Non-Blood Specimens — Beyond the Venipuncture
Certification exams test your knowledge of specimens collected from sources other than blood. As a phlebotomist, you may be asked to collect, receive, or process urine, body fluids, and microbiology specimens. Understanding proper collection, handling, and transport ensures accurate results.
🧪 Urine Specimens — The Most Common Non-Blood Specimen
Urine testing is one of the most frequently ordered laboratory analyses. Different collection methods serve different diagnostic purposes. As a phlebotomist, you may be responsible for instructing patients and receiving specimens.
Clean-Catch Midstream Urine
The clean-catch midstream method is used for urinalysis and urine cultures to minimize contamination from skin bacteria and epithelial cells. It is the gold standard for routine urine culture and sensitivity (C&S) testing.
Instructions for female patients:
- Wash hands thoroughly
- Open the antiseptic towelette provided in the collection kit
- Separate the labia with one hand and keep them separated throughout the process
- Clean the urethral area from front to back using one towelette per wipe — use three towelettes total (left side, right side, center)
- Begin urinating into the toilet (this initial stream flushes away bacteria near the urethral opening)
- Without stopping the urine flow, move the sterile collection cup into the stream and collect the midstream portion
- Remove the cup before urination stops and finish into the toilet
- Cap the container immediately without touching the inside rim or lid
Instructions for male patients:
- Wash hands thoroughly
- Retract the foreskin if uncircumcised
- Clean the glans (head of the penis) with the provided antiseptic towelette, using a circular motion from the urethral opening outward
- Begin urinating into the toilet (initial stream flushes bacteria)
- Without stopping flow, collect the midstream portion in the sterile cup
- Remove the cup before urination stops
- Cap immediately without touching the inside
24-Hour Urine Collection
A 24-hour urine collection measures substances excreted over a full day, providing quantitative data that a random sample cannot. Common tests include creatinine clearance, protein, calcium, uric acid, and cortisol.
Collection procedure:
- Start time: Patient wakes up and voids completely into the toilet — this first void is DISCARDED. Record this time as the start.
- Collection: For the next 24 hours, every drop of urine goes into the large collection container. The patient must collect every void — even at 3 AM.
- End time: Exactly 24 hours after the start, the patient voids one final time into the container (even if they don't feel the urge). This void IS included.
- Refrigeration: The collection container must be kept refrigerated or on ice throughout the entire 24-hour period. Bacteria at room temperature consume creatinine and glucose, invalidating results.
Preservatives: Some 24-hour urine containers come pre-loaded with a chemical preservative (such as hydrochloric acid or boric acid) to stabilize the analyte being measured. Patients MUST be warned: do not remove the preservative, do not pour it out, and avoid skin contact — some preservatives are caustic. The laboratory determines which preservative is needed based on the ordered test.
🧠 Cerebrospinal Fluid (CSF)
Cerebrospinal fluid (CSF) is the clear, colorless fluid that surrounds and protects the brain and spinal cord. It circulates through the ventricles of the brain and the subarachnoid space, cushioning the central nervous system and helping regulate intracranial pressure.
CSF is collected by a lumbar puncture (spinal tap), performed by a physician who inserts a needle between the lumbar vertebrae (typically L3–L4 or L4–L5) into the subarachnoid space. This is a sterile, invasive procedure — phlebotomists do NOT perform lumbar punctures but are responsible for receiving, labeling, and transporting the specimens.
The Numbered Tube System
CSF is collected into three or four sequentially numbered sterile tubes:
| Tube # | Sent To | Tests | Why This Order? |
|---|---|---|---|
| Tube 1 | Chemistry / Immunology | Glucose, protein, lactate | First tube may contain blood from the tap itself (traumatic tap). Chemistry tests are least affected by blood contamination. |
| Tube 2 | Microbiology | Gram stain, culture & sensitivity | Must be sterile. Middle tube is less likely to be contaminated by skin bacteria (from needle entry) or blood. |
| Tube 3 | Hematology | Cell count, differential | Last tube is best for accurate cell count — if blood decreases from Tube 1 to Tube 3, the blood was from a traumatic tap, not a hemorrhage. |
| Tube 4 (if collected) | Special testing | Cytology, viral PCR, oligoclonal bands | Additional testing as ordered by physician |
Traumatic tap vs. true hemorrhage: When CSF appears bloody, compare the cell count in Tube 1 and Tube 3. In a traumatic tap (needle nicked a blood vessel), the blood clears progressively — Tube 3 has fewer red cells than Tube 1. In a true subarachnoid hemorrhage, the blood is evenly distributed across all tubes, and the supernatant is yellow (xanthochromia) after centrifugation.
🫁 Sputum Collection
Sputum is mucus coughed up from the lower respiratory tract (bronchi and lungs). It is NOT the same as saliva or post-nasal drip. Sputum specimens are used to diagnose respiratory infections, including pneumonia, tuberculosis (TB), and lung cancer.
Collection Procedure
- Timing: Collect first thing in the morning (early morning specimen). Secretions pool overnight, making early morning specimens the most concentrated and diagnostic.
- Preparation: Patient should rinse mouth with water (NOT mouthwash, which kills bacteria) to reduce oral flora contamination
- Technique: Instruct the patient to take a deep breath, hold briefly, then cough deeply from the chest — producing sputum, not saliva. The specimen should appear thick, opaque, and possibly colored (not thin and watery like saliva).
- Container: Collect into a sterile, wide-mouth, leak-proof container with a screw-cap lid
- Volume: Most labs require 5–10 mL for adequate testing
Common rejection reasons: Specimen is clearly saliva (thin, clear, watery); insufficient volume; specimen collected in a non-sterile container; specimen received without a label. The lab may perform a quality check: if microscopy shows many squamous epithelial cells and few white blood cells, the specimen is saliva, not sputum.
🩹 Wound Culture Collection
Wound cultures identify bacteria causing infections in open wounds, surgical sites, and abscesses. Proper swab technique is critical — you need to collect organisms from the active infection site, not just the surface.
Swab Collection Technique
- Clean first: Gently remove surface debris and old drainage with sterile saline. Do NOT use antiseptic — it kills the very bacteria you need to culture.
- Swab the wound bed: Press the swab firmly into the wound bed (not the wound edges or surrounding skin) and rotate the swab in a Z-pattern (zigzag) to ensure maximum organism collection. Apply enough pressure to express fluid from the wound tissue.
- Insert into transport media: Immediately place the swab into the appropriate transport tube and crush the transport media ampoule (if applicable).
Aerobic vs. Anaerobic Cultures
Physicians may order both aerobic (grows with oxygen) and anaerobic (grows without oxygen) cultures from the same wound:
| Culture Type | Transport | Key Points |
|---|---|---|
| Aerobic | Standard swab in transport media (Amies/Stuart media) | Most common wound culture; transport at room temp within 2 hours |
| Anaerobic | Anaerobic transport system (oxygen-free vial or tube) | Collect from deep wounds/abscesses; minimize air exposure; transport immediately. Anaerobes die rapidly when exposed to oxygen. |
🦠 Clostridioides difficile (C. diff) Testing
Clostridioides difficile (formerly Clostridium difficile, commonly called "C. diff") is a spore-forming bacterium that causes severe diarrhea and colitis, most often in patients who have recently taken antibiotics. C. diff infection is a major healthcare-associated infection (HAI) and a significant patient safety concern.
Specimen Requirements
- Only liquid (unformed) stool is acceptable — the specimen must take the shape of its container. Formed stool should NOT be tested for C. diff because formed stool indicates the patient does not have active C. diff diarrhea.
- Collect into a clean, leak-proof container with a screw-cap lid
- Transport to the lab within 2 hours at room temperature (or refrigerate if delay is expected)
- Do NOT use a rectal swab — insufficient specimen for toxin testing
What the Lab Tests For
The laboratory tests for C. diff toxins A and B (the toxins that cause disease) and/or the toxin gene (tcdB) using molecular PCR methods. A positive result with formed stool is likely a carrier, not an active infection — which is why only liquid stool is tested.
💧 Specialized Body Fluids
Phlebotomists may receive and process these specimens. Understanding their source and handling requirements is essential for the certification exam.
Amniotic Fluid
Amniotic fluid is the protective liquid surrounding a developing fetus inside the amniotic sac. It is collected by amniocentesis — a physician-performed procedure where a needle is inserted through the mother's abdomen and uterus into the amniotic sac under ultrasound guidance.
Common tests:
- L/S (lecithin/sphingomyelin) ratio — measures fetal lung maturity. An L/S ratio ≥ 2.0 indicates mature lungs ready for birth.
- Bilirubin level — assesses hemolytic disease of the newborn (HDN)
- Genetic/chromosomal analysis — screens for Down syndrome and other genetic conditions
- Alpha-fetoprotein (AFP) — elevated levels suggest neural tube defects
Synovial Fluid
Synovial fluid is the viscous, lubricating fluid found inside joint capsules (knees, shoulders, elbows, etc.). It is collected by arthrocentesis (joint aspiration) — a physician-performed procedure where a needle is inserted into the joint space.
Common tests:
- Crystal analysis — identifies gout (monosodium urate crystals, needle-shaped, negatively birefringent) vs. pseudogout (calcium pyrophosphate crystals, rhomboid-shaped, positively birefringent)
- Cell count and differential — elevated WBCs suggest infection or inflammatory arthritis
- Gram stain and culture — diagnoses septic arthritis (joint infection)
- Glucose and protein — compared with serum levels
📋 Non-Blood Specimens — Quick Reference
| Specimen | Collection Method | Key Handling Rule | Common Tests |
|---|---|---|---|
| Clean-catch urine | Patient self-collects midstream | Clean before collect; cap without touching inside | UA, C&S |
| 24-hour urine | All voids over 24 hrs | Discard first, keep last; refrigerate; preservative | Creatinine clearance, protein, cortisol |
| CSF | Lumbar puncture (physician) | STAT; body temp transport; never refrigerate; 3–4 numbered tubes | Cell count, glucose, protein, culture |
| Sputum | Deep cough, early morning | Rinse mouth first; sterile container; 3 days for AFB | Culture, AFB, cytology |
| Wound culture | Z-pattern swab of wound bed | Clean with saline first; anaerobic = oxygen-free transport | Aerobic/anaerobic C&S |
| C. diff stool | Liquid stool only in cup | Formed stool = reject; soap & water handwash | Toxin A/B, PCR (tcdB gene) |
| Amniotic fluid | Amniocentesis (physician) | Protect from light (foil wrap); transport STAT | L/S ratio, bilirubin, genetics |
| Synovial fluid | Arthrocentesis (physician) | Room temp for crystals; EDTA for cell count | Crystal analysis, cell count, culture |
📝 Knowledge Check
🎓 Course Completion & Exam Prep Preview
You've completed all 6 virtual modules of the Force for Health Academy Phlebotomy Program. Clinical Lab Training Days are next — followed by your certification exam. Let's review what you've mastered.
📊 What You've Mastered — Full Curriculum Map
| Module | Topic | Key Competencies |
|---|---|---|
| 1 | Phlebotomy Fundamentals | Role, blood components, cardiovascular anatomy, medical terminology, ABO/Rh |
| 2 | Compliance & Safety | OSHA, HIPAA, TJC, CLSI, PPE, standard precautions, exposure control, documentation |
| 3 | Preparing the Patient | Patient ID, communication, vein assessment, tourniquet, site selection, special populations |
| 4 | Routine Blood Collection | Equipment, order of draw, 16-step venipuncture, dermal puncture, labeling, complications |
| 5 | Special Collections | Blood cultures, smears, newborn screening, ABG, GTT, pediatric/minimum volume |
| 6 | Processing Specimens | Pre-analytical variables, centrifuge, aliquoting, storage, rejection, critical values, CLIA |
🎯 Top Exam Topics — NHA CPT / ASCP PBT
Based on the NHA CPT exam blueprint and ASCP PBT content guidelines, these are the highest-yield topics:
| Domain | NHA CPT Weight | Key Focus Areas |
|---|---|---|
| Safety & Infection Control | ~17% | PPE, standard precautions, bloodborne pathogens, sharps safety |
| Pre-examination | ~30% | Patient ID, site selection, equipment, order of draw, tube additives |
| Specimen Collection | ~28% | Venipuncture procedure, dermal puncture, complications, special draws |
| Specimen Handling | ~13% | Transport, centrifuge, storage, stability, rejection criteria |
| Non-Blood Specimens | ~6% | Urine collection, throat swabs, other specimen types |
| Lab Operations | ~6% | QC, CLIA, critical values, result reporting, professionalism |
🧠 Final Mastery Flashcards — Highest-Yield Facts
Tap to flip — these are the most tested phlebotomy facts
📝 Final Module 6 Knowledge Check
Module 6 Mastery Quiz
Test your understanding with 20 questions on the topics covered in this module.